
If your home is experiencing frequent plumbing issues such as low water pressure, discolored water, or recurring leaks, you may need a whole house repipe. While the thought of replacing all the pipes in your home can be overwhelming, understanding the process can help ease your concerns and prepare you for a smoother experience.
In this guide, we’ll walk you through everything you can expect during a whole house repipe, from the initial inspection to final restoration. Whether you live in an older home with outdated galvanized pipes or you’re simply tired of constant plumbing repairs, a repipe could be the long-term solution you’ve been looking for.
1. Initial Inspection and Consultation
The first step in any whole house repipe is a professional inspection. A licensed plumbing contractor will assess the condition of your existing plumbing system, checking for signs of corrosion, buildup, and leaks. At this stage, you’ll receive a detailed quote and timeline tailored to your home’s specific layout and needs.
Companies like SoCal Repipe offer free in-home estimates and use high-resolution inspection tools to determine exactly what needs to be replaced.
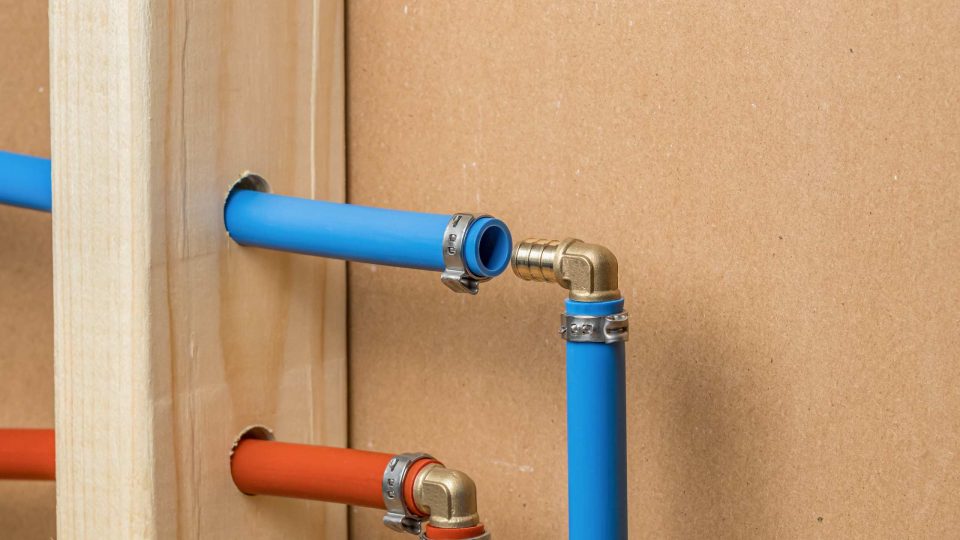
2. Choosing the Right Materials
Once the scope of work is confirmed, the next step is choosing the type of piping material. The most common options for a whole house repipe are:
PEX (Cross-linked Polyethylene): Flexible, cost-effective, and resistant to scale and chlorine.
Copper: Durable and long-lasting, though typically more expensive.
CPVC (Chlorinated Polyvinyl Chloride): A budget-friendly option with good resistance to corrosion.
Your plumbing contractor will help you choose the best material based on your home’s age, water quality, and budget.
3. Preparing Your Home
Before the work begins, your plumber will walk you through how to prepare your home. This often involves:
Clearing access to plumbing areas (under sinks, behind walls, etc.)
Covering furniture and floors to protect from dust or debris
Coordinating temporary water shut-off schedules
During a whole house repipe, your water will be turned off intermittently, but many contractors, like SoCal Repipe, work in stages to minimize disruption and can usually complete the job within 1 to 3 days.
4. Pipe Replacement Process
The actual repiping involves removing old pipes and installing new ones throughout the entire home. This includes:
Walls
Ceilings
Crawl spaces
Attics
Experienced plumbers use minimally invasive techniques to reduce the need for large wall cuts. With modern tools and methods, your whole house repipe will be efficient, clean, and code-compliant.
5. Final Inspection and Wall Restoration
After the new plumbing system is installed, a thorough inspection is performed to ensure everything meets local building codes. The water system is tested for leaks, pressure consistency, and flow quality.
Following that, any holes in walls or ceilings are patched and restored to their original condition. Many homeowners are pleasantly surprised at how little cosmetic impact a whole house repipe actually leaves behind.
6. Long-Term Benefits
While a whole house repipe is an investment, the benefits are well worth it:
Improved water pressure
Cleaner, better-tasting water
Fewer plumbing emergencies
Increased home value
Peace of mind
Most repiping projects come with long-term warranties, especially when done by specialists like SoCal Repipe, who focus exclusively on whole-home plumbing solutions.
Final Thoughts
If your plumbing system is causing constant frustration, a whole house repipe may be the best solution for restoring reliability and performance to your home. By knowing what to expect throughout the process, you can make informed decisions and feel confident in your investment.
For homeowners in Southern California, SoCal Repipe offers expert service, fast turnaround times, and years of experience specializing in repiping solutions. Schedule your free consultation today and take the first step toward a stress-free plumbing system.